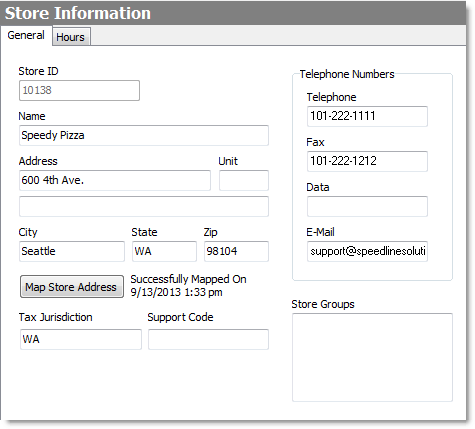
It is important to keep your store contact and tax information up-to-date. The store name, address, and phone number you enter here will appear on certain reports (for example, House Account Statements and Inventory Purchase Orders) and the tax jurisdiction is needed to apply taxes when items are sold.
If you are using the LiveMaps delivery mapping add-on, the store address and zip code will be used to map the store's location.
If you are using the SpeedLine Connect add-on module for off-site ordering, it is also important to update your store opening and closing times, as the off-site ordering system may query Store Manager for this information. (For more information on SpeedLine Connect, contact your SpeedLine sales representative.)
Click the links below to see instructions:
1.Go to the Settings > System> Store Information>  > General tab. > General tab. 2.Update or enter information as necessary. To see a description of each setting in the image below, click it with your mouse.

|
Note The Store ID number is referenced in many places, including in DayFiles, database tables, and SpeedDine Analytics, and can only be changed with the assistance of SpeedLine Support.
|

|
Note If your store address changes and your LiveMaps delivery zones are based on distance from the store, you will need to recreate the delivery zone boundaries. See Define Delivery Zone Boundaries for steps.
|
|
Click a setting to read its description:
|

|
|
3.On the Edit menu, click Save Changes. |
1.Go to the Settings > System> Store Information>  > Hours tab. > Hours tab. 2.In the Open column, select the check boxes beside the days your store is open. 3.Click in the Open Time or Close Time columns and type or select a new time to reflect the time your store opens and closes each day.

|
Note Changing the store hours on the Hours tab has no effect on hours shown on any online ordering website. If you use SpeedDine, change online hours using the SpeedDine Admin site. You can also add a Special Day through the SpeedDine Admin site or Terminal.
|
4.On the Edit menu, click Save Changes. |
1.Go to the Settings > System> Store Information>  > Analytics tab. > Analytics tab. 2.In the Analytics Web Site field, enter the web address given to you by SpeedLine when you registered for Analytics. 3.On the Edit menu, click Save Changes. 4.Refresh Terminal. You will now be able to access the SpeedLine Analytics login screen by touching the Analytics button on the Terminal Manager screen. |
•Map the Store Address (if using the optional LiveMaps delivery dispatch add-on)
See Also:
•Configure an Off-site Order System
•Add or Modify Tax Groups
•Add Store Groups (Menu Designer Help topic)


