Once Prep Planning is set up, you can view and print a prep plan by following the instructions in this topic. If you have not yet set up prep planning, go to the start of the Prep Planning SpeedStart Tutorial for instructions.
|
Note Before using information provided in the Prep Plan, you should have sales and food usage data from at least one full week of business. |
1.Go to the Today> Operations Planning> Prep Planning ![]() >Prep Plan tab.
>Prep Plan tab.
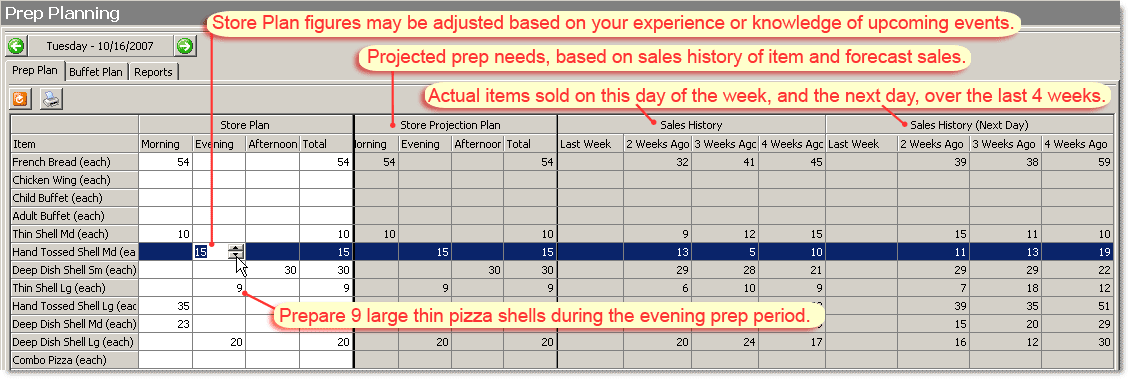
2.Beside the date, click the drop-down arrow  to select the preparation date to view from the calendar.Your prep plan table will predict what food should be prepared during each of the prep periods (prep parts) for the day.

A typical prep plan.
3.Adjust the numbers in the Store Plan columns to reflect your experience or knowledge of upcoming events, if needed.
|
Caution Clicking the Revert to System button |
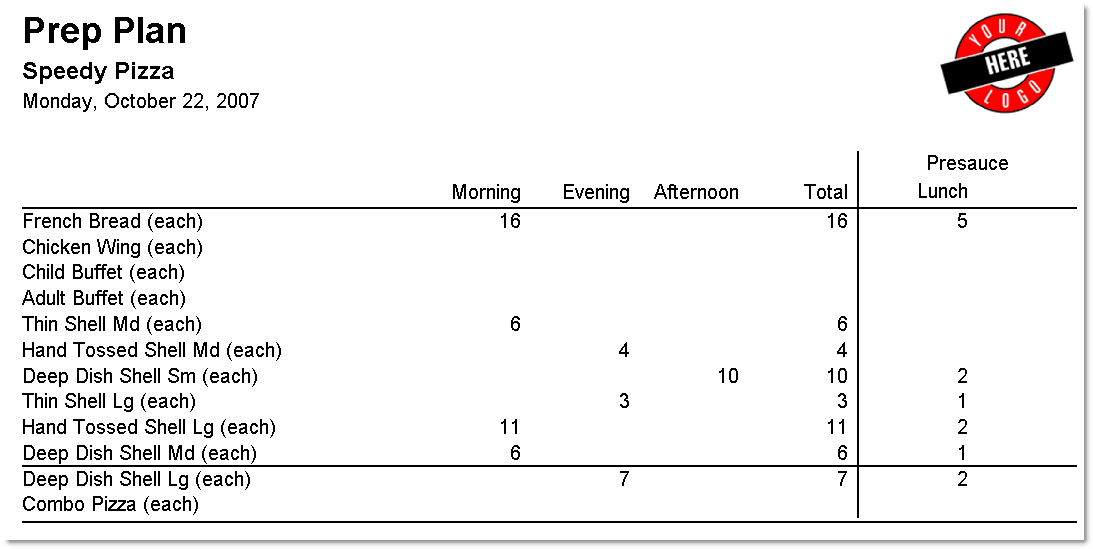
4.Click the Print button  to print a prep plan report that you can post on the wall or clipboard in your prep area. The report will also list the number of items to pre-sauce.

|
Hint Prep planning reports may also be printed by clicking the Prep Planning Reports tab and then clicking the Prep Plan and the Run Report buttons. |
Prep Planning SpeedStart Tutorial 
You have now completed the Prep Planning SpeedStart Tutorial.
|
Hint You can check the accuracy of your past prep plan reports by running a Prep Variance report. See Check the Accuracy of Prep Planning. |
If you would like to set up buffet planning as well, see the Buffet Planning SpeedStart Tutorial.
•Step 1: Define Prep Times (Prep Parts)
•Step 2: Tag Prep Items in Menu Designer
•Step 3: Enter General Prep Planning Settings
You are here  Step 4: View and Print a Prep Plan
See Also:
•Additional SpeedStart Tutorials 


 will clear any manually-adjusted values and return to system-generated projection numbers. Manually-entered data that has been cleared is not recoverable.

