1.Open an existing panel in the Panel Designer. 2.Click the Wizard button  on the Standard toolbar. The Add Buttons wizard opens. on the Standard toolbar. The Add Buttons wizard opens. 3.Click Next to continue to the Select Items tab. 4.Click the Expand button  to expand the Menu Tree until you find the groups, items, or modifiers you want to add to the panel. Highlight the item, modifier, or group to add, and then click the Add button. Repeat until you have added all of the items you would like buttons for. to expand the Menu Tree until you find the groups, items, or modifiers you want to add to the panel. Highlight the item, modifier, or group to add, and then click the Add button. Repeat until you have added all of the items you would like buttons for. 5.Click the Move Up or Move Down buttons to arrange the items in the desired order. Click Next to continue to the Item Options tab. 6.Leave the Only Make Buttons for Active Items check box selected, unless you want buttons for inactive menu items (for example, seasonal items that cannot currently be ordered) to display in Terminal. Click Next to continue to the Button Options tab. 7.Select the button options (these options can be adjusted later if needed using the Components Property Editor): a.Choose between a vertical or horizontal arrangement of buttons. See Panel Designing Tips for panel layout information. b.Use the arrows  to specify the size and spacing of buttons. to specify the size and spacing of buttons. c.Click the Button Font button to choose the font, font style, and size for button captions.

|
Note Button font colors are determined by the button style selected in the next step.
|

|
Hint The text on the Button Font button shows a preview of the selected font.
|
8.Choose a style for the button from the Style drop-down list. Button styles determine the button background and caption color, and are set in Store Manager. See Set Colors for Menu Buttons in the Store Manager Help. 9.Click Next to continue to the Place First Button tab. A green First Button outline appears on the panel. 10.Press and drag to move the First Button box into the desired position. (Press and drag the title bar of the wizard window if you need to move the window out of the way to position the first button.) The first button will be at the top left of the group. Remaining buttons will be arranged vertically below or horizontally to the right of this button, depending on the arrangement selected in step 7.

|
Note Do not place menu item buttons in the area reserved for automatically-generated buttons. The Notes and Clear buttons are generated just to the right of the question mark on the swoop, and the menu panel navigation buttons are generated along either the right or left edge of the panel. Menu panel button position is set in Store Manager. See the Store Manager Help topic Move Menu Page Buttons.
|
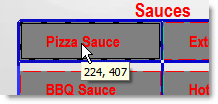
11.Click Done to confirm the first button placement and exit the wizard. Panel Designer will automatically arrange the remaining buttons in the group relative to the location of the first button. The new group of buttons is displayed on the panel. 12.Click on the buttons to view their properties. The properties are displayed in the Components Property Editor on the left-hand side of the screen.

|
Note In Terminal, a red dot will automatically appear on buttons linked to a modifiers when the order-taker selects menu items containing those modifiers.
|
|

 To Add a Menu Item Button Manually:
 Step 4: Add Terminal Buttons
 on the
  to expand the Menu Tree until you find the groups, items, or modifiers you want to add to the panel. Highlight the item, modifier, or group to add, and then click the
  to specify the size and spacing of buttons.


