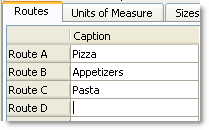
The Routes tab is used to define the prep areas in your restaurant, and the printers assigned to those areas. In Menu Designer, each menu item (Anything that can be sold to a customer is considered a menu item. Pizza, drinks, and promotional merchandise are examples of menu items.) can be assigned to a make route. Make routes can be assigned to printers in Store Manager. For more information on using make routes, see Printer Make Routes (in Store Manager Help).
Some examples of make routes include:
•Pizza
•Appetizers
•Pasta
•Fryer
To Add Make Routes:
1.Click the Menu Root  , and then click the Routes tab.
2.Click in each Caption field, and enter the name of the make route. The new make route will now be available for selection in the As Item tab of Item/Modifier nodes. ![]()
3.Click the Save button  on the toolbar.

|
Note You can name a maximum of 26 make routes, and send more than one make route to a printer. |
See Also:
•Understanding Printing and Make Routes
•Printer Make Routes (Store Manager)

