The calendar provides an easy way to stay on top of your business by displaying a customizable list of statistics for a selected day, week, or month. You can also add your own appointments.
The Summary Data button displays a customized list of vital statistics related to your business. Choose the items you want to display from a comprehensive list that includes labor and overhead costs, a variety of sales figures, and the average temperature. You can also jump directly from the calendar to Scheduling or the Day Report.
To Navigate Around the Calendar
1.Go to Today> Today's Tools> Calendar. ![]()
2.Click the Day, Week,  or Month button above the calendar to choose what length of time to view, and then click a day or week in the mini-calendar at top right.
3.To view a different month:
•Click the arrows at the top of the mini-calendar.
-or-
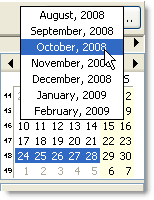
•Press and hold the month name at the top of the mini-calendar, and then select the month to view.

4.To highlight the current day, click the Today button.
5.To jump to the scheduling Weekly Summary screen or the Day Report for a certain day, right-click on the day you want to view, and click Scheduling or Day Report.
|
Note If there is no Day Report for the selected day, the Day Report right-click option is not available. |
1.Click the Day button.
2.Highlight the appointment time frame by clicking the start time in the calendar and dragging to the end time.
3.Right-click and click Create Appointment.
4.Review the start and end times and adjust if needed.
5.In the text field, enter a description of the appointment, and click OK. The appointment is shown in the calendar, and the date is shown in bold in the mini-calendar.
To Select Summary Data to Display on the Calendar
1.Go to Today Tab> Today's Tools> Calendar. ![]()
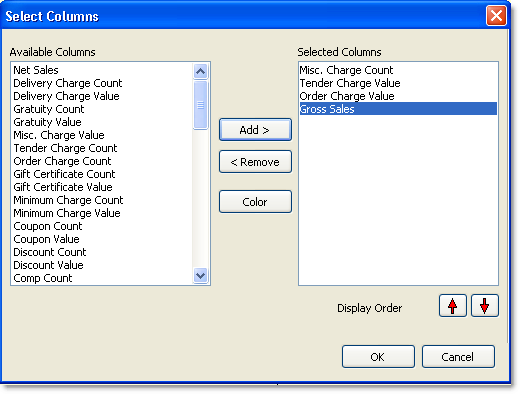
2.Click the Summary Data button to show the Select Columns window.

3.In the Available Columns list, click the value you want to display in the calendar, and then click the Add button.
4.If you want the text for the value to display in color, click the Color button, select a color, and then click OK.
5.Repeat until you have selected all the columns you would like to show in the calendar.
6.To re-order the columns you have selected for display, click the Display Order arrows.
7.Click OK. The calendar will display the values you have chosen.
|
Notes -No data entries will appear if they do not exist for that day, such as a day in the future.
-You can only fit a certain number of summary data values within a day in your calendar view. The weekly view fits 20 values; the monthly view fits 12. |
To Change the Calendar Day Start Time
1.On the Edit menu, click Preferences.
2.In the Calendar View Start Time field, type or select the time you want calendar days to start.
See also:

