1.If not already on the SpeedLine Connect Sources tab, go to Settings> System> SpeedLine Connect, ![]() and then click the SpeedLine Connect Sources tab.
and then click the SpeedLine Connect Sources tab.
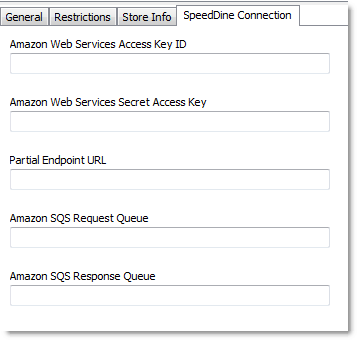
2.Click the SpeedDine Connection sub-tab.
3.Enter the connection information for the SpeedDine source. These values are provided by SpeedLine Support, or may be copied from the SpeedDine Admin Stores> General> Amazon Connection Data tab. Click the settings in the image below to see an explanation of each.
4.On the Edit menu, click Save Changes.
|
Note The Store Info tab can be ignored when using SpeedDine, as all information check boxes are pre-selected to include in the response. |
You have now completed the add a SpeedDine Source SpeedStart Tutorial 
Next Steps
•If you have some SpeedLine stations with reduced processing power and you experience slowdowns or crashes when receiving Connect orders, you can control the number of copies of Connect running on a station, and whether Connect or Terminal is used to process orders. See Control Connect Service for steps.
•Step 1: Activate Connect
•Step 2: Set Connect Source General Properties
•Step 3: Set Connect Source Restrictions
You are here  Step 4: Enter SpeedDine Connection Settings


