Linked panel button sets consist of two parts: Styled Speed Buttons and an underlying Linked Panel container. These two parts of the button set are selected and edited separately. Linked panel buttons are sized and positioned the same way that other panel components (An element that can be placed on a menu panel using the components toolbar in Panel Designer. Some components, for example simple item buttons, are linked to items in your menu. Other components, for example quantity or size buttons, are linked to information in the Root Menu tabs. There are also components, for example titles and background shapes, that are not linked to menu information.) are. This topic covers only the editable properties that are unique to the underlying Linked Panel container.
•Click the links below to see instructions for editing the properties of linked panel containers:
1.Open the panel in Panel Designer, and then click the solid gray handle [The solid gray border at the edge of a linked panel.] located at the edge of the linked panel to select it. 2.Hover over one of the black anchor points at the edge of the panel until a 2-headed arrow  appears. appears. 3.Click and drag to the desired size. A sizing tooltip gives the dimensions (width x height) of the panel as you drag. 
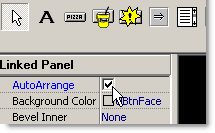
4.Release the mouse. If the buttons no longer fill the panel, select AutoArrange in the Components Property Editor. The buttons will be resized to fill the linked panel container. 
|
1.Open the panel in Panel Designer, and then select the linked panel in the Panel Designer workspace. 2.Do one of the following: •In the Components Property Editor, click Left and Top and enter the desired values for the component distance in pixels from the left side or top of the screen. -or-
•Click the handle (The solid gray border on one edge of a linked panel.) area at one edge of the panel and drag it to the desired position. |
1.Open the panel in Panel Designer, and then select the linked panel in the Panel Designer workspace. 2.In the Components Property Editor, click Link, and then select the new link type from the drop-down list. 3.A selection window will appear to allow you to select which options to display buttons for. Clear the check boxes beside options that you do not want to display, and then click OK. 4.The new buttons appear in the linked panel container. Adjust the size of the container as needed (see Change the size of the linked panel, above). |
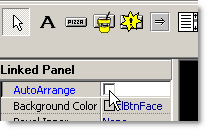
1.Open the panel in Panel Designer, and then select the button in the Panel Designer workspace. 2.In the Components Property Editor, clear the AutoArrange check box. You are now able to move or size buttons in the set independently. 
|

|
Hint If you mistakenly select and move individual buttons in a linked panel button set, the easiest way to reposition the buttons is to click the handle area to select the linked panel container, and then select AutoArrange in the Components Property Editor.
|
See Also:
•Position Panel Components
•Size Panel Components
•Select Panel Components for Editing
•Add Quantity, Portion, or Other Linked Button Sets
•Save A Menu File
•Panel Designer Keyboard Shortcuts
•My Size Buttons Are Adding Different Sizes to an Order


