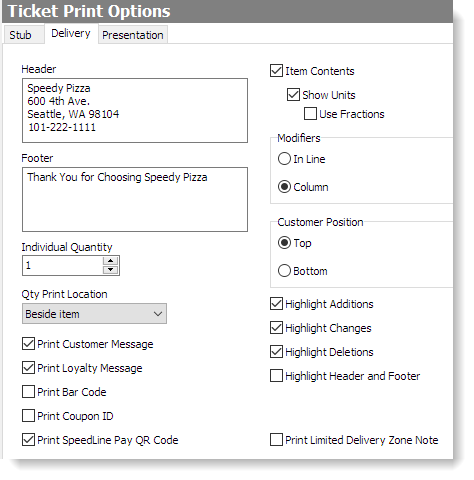
You can choose options and enter header and footer text for each format of printed ticket. There are three available ticket formats (click the link below to see examples of each format). For Delivery and Presentation ticket formats, you have options for controlling where information is positioned on the ticket and whether it is highlighted; the Stub ticket format is preset, but you can enter a header and footer.
This topic covers setting the format of customer tickets. If you are using make tickets for food preparation, see Set Printer Make Routes and Format Make Tickets for information about formatting those.
Click the links below to see instructions for completing each task.
Tickets can be printed in three different formats (shown below): ticket stubs, delivery tickets, and presentation tickets. The information printed on these tickets can be customized, but the examples shown are typical.
|
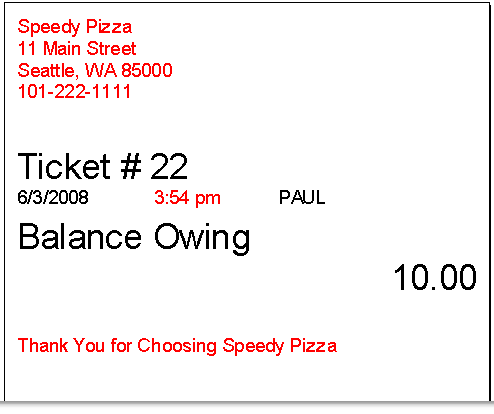
A ticket stub format. Does not show items ordered. Used as a payment stub.
|
|
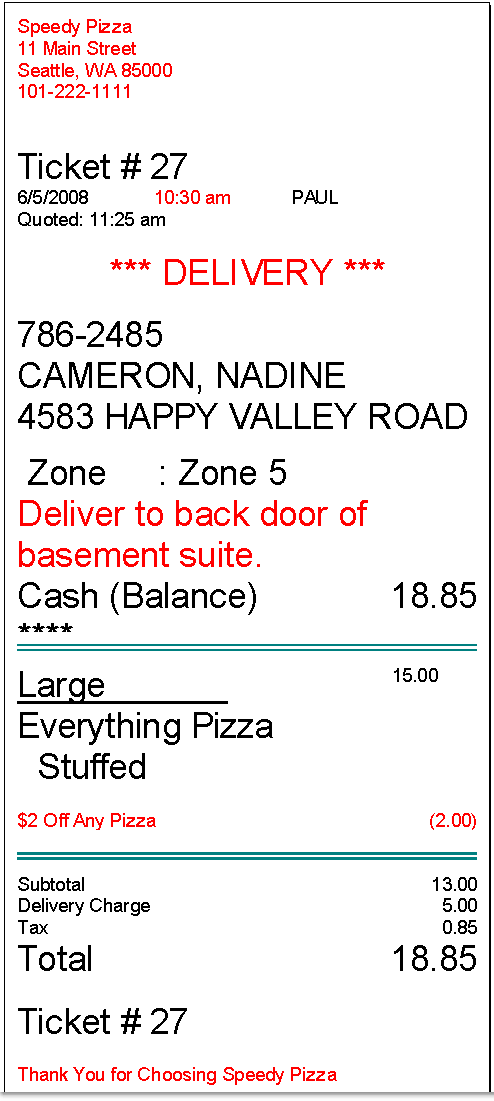
A ticket delivery format. Has large print. Used for delivery orders, and often take-out and pick-up orders.
|
|
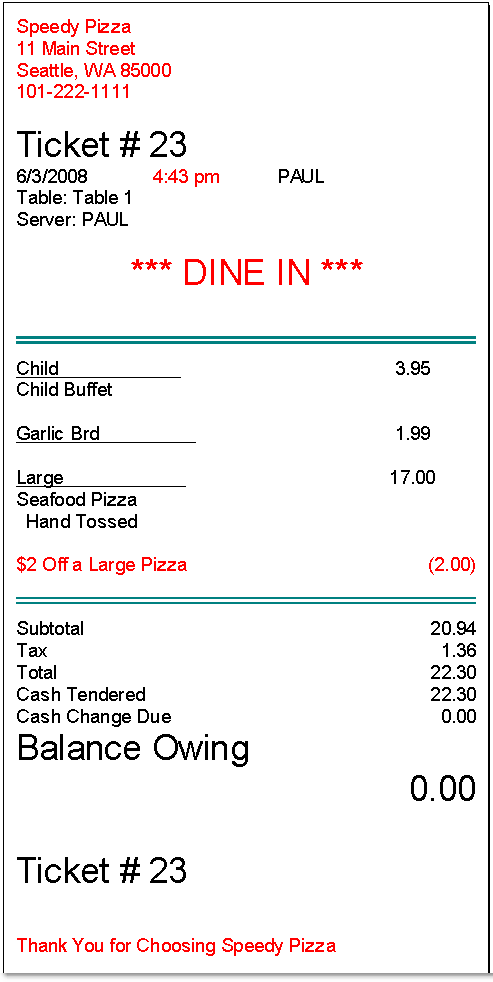
A ticket presentation format. Typically used for dine-in orders. Items and modifiers are printed in smaller text.
|
|
Ticket stubs typically provide only the most basic information – the date, time, and ticket total. They are typically used by customers to pay their bills; they do not list menu items. You can add a header, footer, customer messages to the stub format, and you can specify what customer information is included.
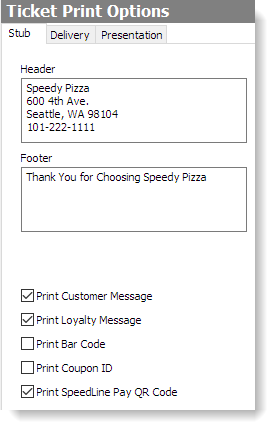
1.Go to the Settings> Hardware> Ticket Print Options.  Stub tab. Stub tab. 2.In the Header field, enter any information you want to print at the top of the ticket (for example, the store name and contact information). 3.Change the stub print settings as required. Click the settings in the image below to see a description of each.
|
Click a setting to read its description:
|

|
|
4.On the Edit menu, click Save Changes. 5.Refresh Terminal to print stubs with the new format. |
The Delivery and Presentation ticket formats are very similar, but items are listed in a larger text size for Delivery tickets to make them easier to read. The Presentation format is typically used for dine-in orders.
1.Go to the Settings> Hardware> Ticket Print Options  > Delivery or Presentation tab. > Delivery or Presentation tab. 2.In the Header field, enter any information you want to print at the top of the ticket (for example, the store name and contact information). 3.In the Footer field, enter any information you want to print at the bottom of the ticket (for example, a thank you to customers, or the store hours). 4.Change the other settings on the tab, if desired. View setting descriptions by clicking the settings in the image below.
|
Click a setting to read its description (Both Delivery and Presentation tabs have the same settings):
|

|
|
5.On the Edit menu, click Save Changes. 6.Refresh Terminal to print tickets with the new format. |
See also:
•Set Content of Tickets for Each Order Type
•Set Ticket Print Options by Order Type
•Set Printer Make Routes and Format Make Tickets
•Print Loyalty Message on Tickets
•Customer Messages


