1.Click the Store Manager Settings tab, and then click the System group.
2.Click Operations Planning. ![]()
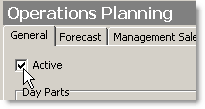
3.On the General tab, select the Active check box to activate the Operations Planning feature.

4.In the Day Parts area, click Add.  A new line appears. Day parts are usually the meal times for your restaurant.

5.Enter a name (usually a meal, like lunch or dinner) in the first column and then click the Caption column to auto-fill it with the name.
|
Note SpeedLine recommends setting the start time of the first day part to one hour before the store opening time to ensure that any early sales or activated deferred orders are included. |
6.Click the Start Time column and use the up arrow  to enter the start of this day part, then click in the Peak columns and enter the start and end of your busy period for the meal. The peak period information will be used in Prep Planning.
7.Repeat steps 4 to 6 to add your other meal times.
8.When finished, on the Edit menu, click Save Changes to save your day part information, and go on to the next step.
Sales Forecasting SpeedStart Tutorial 
•Sales Forecasting Tutorial Home
You are here  Step 1: Define Meal Times (Day Parts)


