
Follow the steps below to set the options for displaying and monitoring dine-in service on the Table screen in Terminal.
|
Note Some table service options are set by order type. See the Change General Order Type Options topic to set these additional options. |

1.On the Settings tab, click Orders, and then click Table Service. ![]()
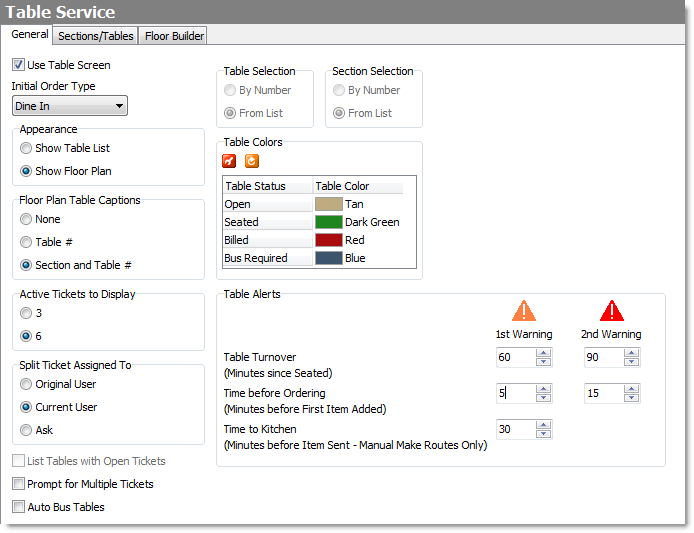
2.On the General tab, select the settings to use for your dine-in service. Click the settings in the image below to see a description of each.

3.When finished selecting settings, on the Edit menu, click Save Changes.
|
Important Before you change the Appearance setting to Show Floor Plan, you must create or import a floor plan into the Floor Builder tab. See Build a Table Floor Plan for instructions. |
|
Caution Change the Appearance setting only after closing the store or before opening the next day. Tickets are not transferred between views, so tickets (including open tickets) could be hidden if the Table screen appearance is switched between List and Floor Plan mid-day. |

4.Refresh Terminal to activate your new table service options.
|
Hint To see up-to-the-minute table service report sections on the Terminal DayReport, select the Server Summary, Table Summary by Section and Table Service Performance DayReport sections. See Customize Day Report Sections for more information. |

See Also:
•Edit Order Type General Options for an explanation of the # Seats, Table, Allow Zero Seats, and Assign to Server settings that will affect table service.
•Customize Day Report Sections to turn on the Server Summary, Table Summary by Section, and Table Service Performance DayReport sections.
