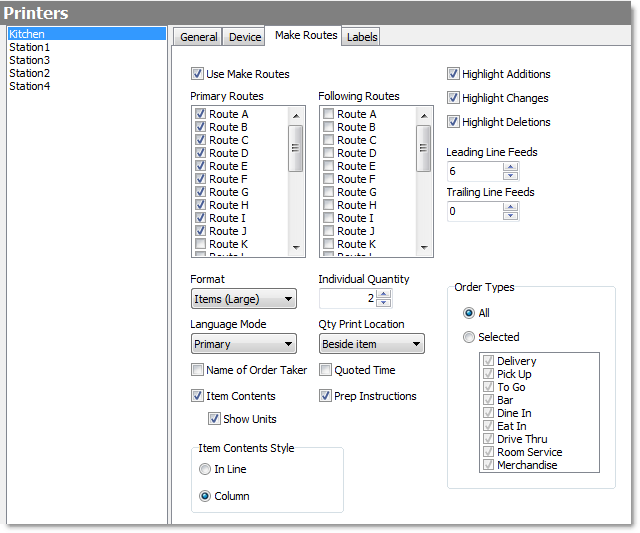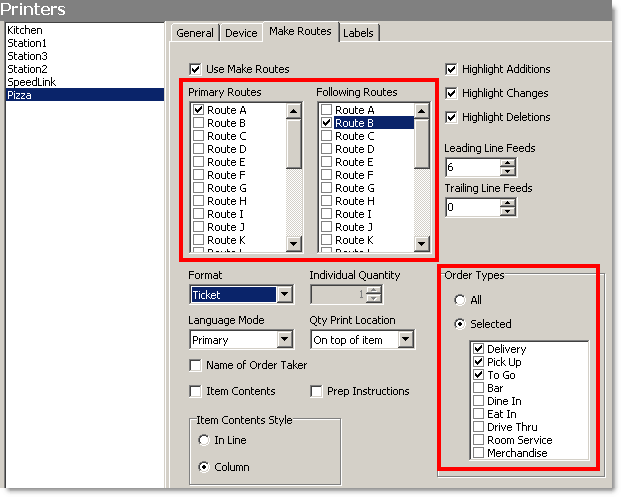
When an order is placed, make tickets tell the kitchen staff what food to make. Make routes tell SpeedLine where to print the menu items (for example, a kitchen printer, or a bar printer).
Make routes are assigned to menu items in Menu Designer. See the Assign Make Routes topic in Menu Designer Help for instructions on assigning make routes to items. The make routes are then assigned to printers, and the make tickets formatted, in Store Manager using the settings below.
To Assign Make Routes to Printers and Format Make Tickets
1.Go to the Settings> Hardware> Printers ![]() > Make Routes tab.
> Make Routes tab.
|
Caution A store's make routes are usually set up during installation. Changing the Primary Routes, Following Routes, or Order Types after installation can cause orders to print improperly, or not at all. |
2.In the printer list on the left, select the printer you wish to add make routes to or edit make routes for.
|
Note To determine the caption associated with each route (for example, Route A = Pizza), open your menu in Menu Designer and look at the Routes tab. The route is assigned to a menu item on the item's As Item tab. |
3.Adjust the settings for the printer. Click the settings in the image below to see an explanation of each.
4.After making changes, on the Edit menu, click Save Changes.
5.Refresh Terminal to implement your new settings.
See also:
•Set Ticket Print Options by Order Type
•Assign An Alternate Printer Route
•Assign Make Routes (Menu Designer Help)
•Print Recipes on Tickets or Show on Displays (to print ingredients and amounts on tickets, or to show ingredient names only on kitchen displays).


