The Tickets, Dispatch, and Driver Detail ticket list screens in Terminal can be customized for your operation using ticket grid templates. The templates allow you to choose what information you want displayed and how it is arranged on the screen.
For example, you might want to:
•Highlight orders that include notes so that special instructions don’t get overlooked.
•Add an Order Source field to show which orders come from third-party delivery services like DoorDash or Uber Eats for easier pickup.
•Show your expeditor or drivers how many sides go with each order so nothing gets left behind (see Add a Sides Column to a Ticket List).
•Show the ETA for on-way orders.
•Flag online and deferred orders so staff can prepare for the extra volume.
•Add a city to the address if you deliver to more than one town with the same street names.
•Add an Order Source line property to make it easier to find orders from third-party services like Grubhub or Postmates when the driver arrives.
•Add a 3rd-Party delivery column to the dispatch list to see which tickets have been assigned to third-party delivery service drivers, for example DoorDash "Dashers."
Click the links below to see instructions for completing the tasks. You can either edit an existing default template, or add a new template to suit your needs.
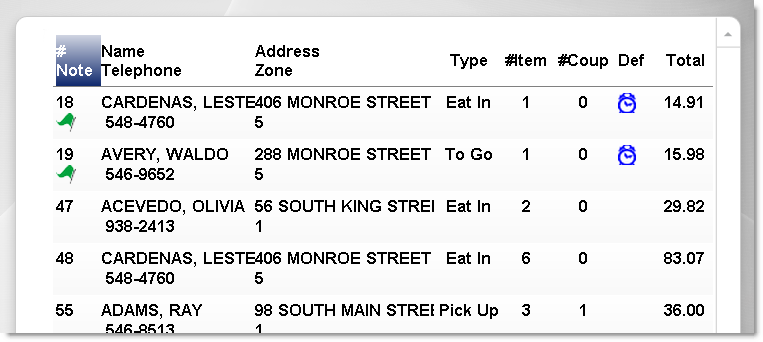
A customized Terminal ticket list for the Tickets screen. The first two columns have two lines each.
1.Go to Settings> System> Ticket Grid Templates.  2.Click the name of the template you want to add the column to in the Template Name list. 3.In the Customize Columns area, click the New Column button. The Ticket Grid Column Wizard opens. 4.Click Next and then select the number of lines of information you would like to appear in the new column for each ticket. Each line will contain different information. 5.Click Next and then in the left-hand field, select a value for the information contained in line 1 of the column. Click the Expand buttons  for the categories to see the complete list of available content. for the categories to see the complete list of available content. 6.Click the arrow  to add the information to be included on line 1. to add the information to be included on line 1. 7.In the Caption field, type a caption for the line. This will appear at the top of the column. Keep in mind that space is usually limited, and use abbreviations when possible. 8.If the Icon field is available (which it is for information values that have a possible "yes" or "no" response) choose an icon from the list to identify the "yes" response, and then click Next. 9.Review the information displayed on the Confirmation page, and then click Next. 10.If you would like to add another column to the layout click Yes, otherwise click No, and then click Finish to exit the wizard. 11.Click the newly-added column in the Customize Columns area. 12.In the Column Properties area, adjust the alignment and column width.

|
Note You may need to reduce the width of one or more other columns to make room for your newly-added column. To do this, click on another column listed in the Customize Columns area and then decrease the value in the Column Width field.
|
13.To cause the tickets to sort based on the values in the selected column, select Initial Sort Column.

|
Hint Touching any column heading in Terminal will cause tickets to temporarily sort based on values in that column.
|
|
 | To Add an Additional Line to a Column You can add more lines of information to an existing column. Adding a second line will help save space while allowing you to display all the ticket information required for your operation. |

|
Note Adding more than three lines to a column often reduces legibility, and is not recommended.
|
1.Go to Settings> System> Ticket Grid Templates.  2.In the Template Name list, click the name of the template you want to edit. 3.In the Customize Columns area, click the column you would like to add a line to, and then click the New Line button. A new line is listed in the Customize Columns area under the column you selected. 4.In the Line Properties area, click the drop-down arrow  in the Property field. in the Property field. 5.Click the Expand buttons  for the categories to see the complete list of available content for the new line. for the categories to see the complete list of available content for the new line. 6.Click to select the information you want, and then click OK. 7.In the Caption field, type a caption for the line. This will appear at the top of the column. Use abbreviations when possible. 8.If the Icon field is available (which it is for information values that have a possible "yes" or "no" response) choose an icon from the list to identify the "yes" response. |
1.Go to Settings> System> Ticket Grid Templates.  2.In the Template Name list, click the name of the template you want to edit. 3.Click the Edit button.  4.To rename the template, type a new name for the default template in the Template Name field. 5.Select a screen from the Preview Screen Width list. This will change the width of the preview area to reflect the size of the screen the template will display on. 6.Click OK. The new name and preview size are displayed in the template list.
|
1.Go to Settings> System> Ticket Grid Templates.  2.Click the name of the template you want to edit in the Template Name list. 3.In the Customize Columns area, click the column you would like to move, and then click the Display Order arrows   to move the column up or down in the list. to move the column up or down in the list. |
 | To Copy a Template If you would like to use a new template that is similar to an existing template, you can copy the existing template and then make any small changes required. |
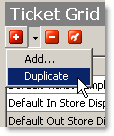
1.Go to Settings> System> Ticket Grid Templates.  2.In the Template Name list, click the name of the template you want to copy. 3.Click the arrow beside the Add button, and then click Duplicate. A new template named "Copy of..." is added to the list.
4.Change the name of the template, and add or delete columns or lines as required, using the instructions in the other sections on this page. |
 | To Add a New Template If none of the existing templates are similar to the one you want to use, you can build a completely new template. |
1.Go to Settings> System> Ticket Grid Templates.  2.Click the Add button  3.In the Edit Template Name and Size window, do the following: a.In the Template Name field, enter a name for the template. b.Select a screen from the Preview Screen Width list. This will change the width of the preview area to reflect the size of the screen the template will display on. c.Click OK. 4.The new template appears in the Template Name list. Follow the instructions in the To Add a Column to a Template section on this page to add columns to the new template. |
1.Go to Settings> System> Ticket Grid Templates.  2.Click the name of the template you want to edit in the Template Name list. 3.In the Customize Columns area, click the column or line you would like to delete (click the Expand button  to see the lines in a column). to see the lines in a column).

|
Caution Deleting template lines and columns cannot be undone.
|
4.Click the Delete button.  5.The line or column is removed from the template. |
See Also:
•Add an Item Category Column to a Ticket List
•Add a Sides Column to a Ticket List
•Indicate Tickets Assigned to Third-Party Drivers on the Dispatch List
•Assign Tickets Screen Layouts to Stations
•Assign Layouts to Dispatch or Driver Detail Screens


